
Thank you for the feed back on the tutorial # 1 - glad that you are getting something out of it.
I thought I'll rabbit on a bit about fabrics, the most important thing is to look at fabrics as a source of components for the various bits of the applique shapes. Quite a lot of fabrics in the Kaffe Collectives are rather busy and usually I can find lots of things in it to use for appplique. When I open my fabric package from GloriousColor, I pull each fabric to it's full width and look for the interesting areas to use.
take the " Coleus" fabric below, those leaf veins are great for bird's tails for example, or a little tree?


and the bit below might be good for the body of the bird or a fruit or a vase - with the lines going horizontal. The leaf shape next to it, is also interesting, for a flower perhaps? Move your freezer paper templates around the fabric and see! Don't look at the fabric as a whole, find the components, you'll be surprised how many useful portions there are in a fabric.

Here is another great fabric, " Scallops" - I used this for the dog's body in the quilt. I can see quite a few different animal bodies with this fabric. If you look at the other colourways you'll find even more useful items.
Still the " Scalops" fabric - can you see a tree?

Or with this one - you can use this for the cat's face if you include some of the lighter area below it. Or - if you position the tree template half on the 3rd layer and the other half on the lower layer, the tree will be more interesting than a plain green fabric, don't you agree?

This one would make a great tail or a vase?

This " Shell Montage" fabric is one of my favourite - in all colourways! I've used this for a lot of bird parts and flowers, again move your templates around and see what you can find.


I've used this portion as the standard tree in the " Pond" block.

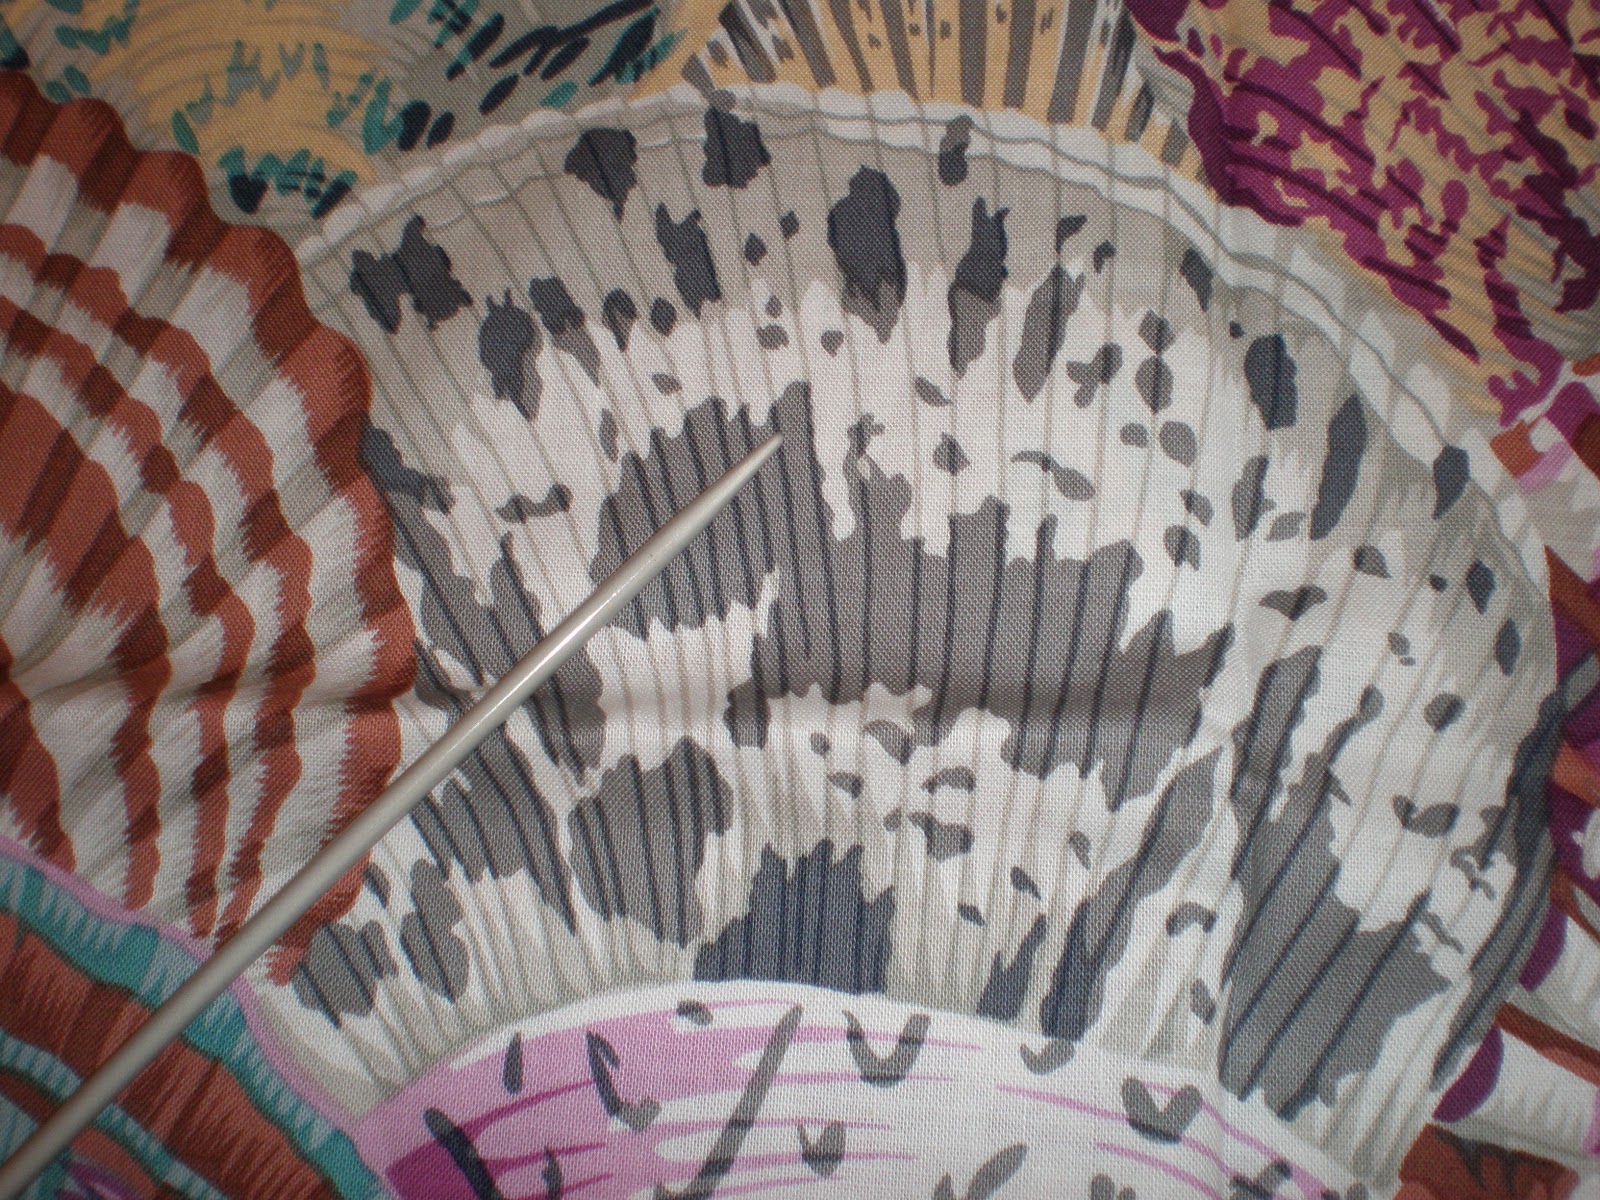
This " Feathers" fabric is fantastic, can you see a lot of use for this one?

Or this bit?


This is the " Brassica" - it is all yummyness. Trees, flowers, bird wings, leaves?

I love this fabric " Mirage" , used it a lot in the " Roseville Album" - it would be great for one of the biggish tree, then you can put a lot of different colour circles for the fruits.

And this is the " Ombre", my favourite, it comes in 2 new colours. I used it in the " Fountain" block, I love the way the " arbour" changes colour.

I also love stripes, very useful for vases or planters or building structures. Also in pieced blocks, see the " Wheel" in the quilt.

This fabric is great for the big pieces as well as for the small animal parts. I've used it in the
" Disc" block. I can see bird wings here!


I've used this fabric a lot, not sure of the name but if you go to the GloriousColors website you'll find it there. Great for the larger trees, as the colour moves from red to pink with touches of greens.

And this one " Floral Burst" I think it is called. If you use this for the bigger trees, the tree will have quite a few colours in it.

In a real class, it is much easier to show useful fabrics. I hope you get the idea with the few examples above. The only thing is that I very rarely do classes these days as I have a day job!
I am due to teach in New Zealand though, in July 2013 at the Taupo Quilt Symposium for 3 days. Love to see you if you are in that part of the world!
The next item I'm going to move on to, is the " Double Circle" blocks that form the borders and sashings. For these blocks, I have these nifty gadgets which I purchased at quilt shows. These circle template stacks are made by a company called " Victorian Textiles " but they they are wholesalers. I've checked with Kathy at " Material Obsession" and she has these in stock if you think you might need them. They come in 3 different packs, one is in 1" - 5" diameter, the next is 5 1/2" to 8" and 8 1/2" - 10" and they come in 1/2" increments. They look like the photo below. Each circle has cross hairs on it so you can line them up.

If you read the instruction, for these double circle blocks, you are asked to cut 5" square for the background ( the green) and 4" square for the outer circle ( the yellow ) and an interesting 2" circle for the focal circle ( the purple) You can also buy the stack of squares!
Press the squares so that you can see their midlines.


Now, line up those marks on the purple fabric with the creased centre lines on the yellow fabric.
Applique.

When done, put the 3" circle with the drawn in 2" on top and line it up with the appliqued circle and the pressed midlines. You'll have below.

Place the marked yellow fabric on the green and line up the creased line and applique the circle.

When done, turn it and onto the wrong side, you need to mark the 4" square. I've also drawn in the 3" circle inside the 4" square. This is the sewing line of the block. If you are going sew using the machine later on, mark the 3" circle inside a 4 1/2" square.

And cut away the excess fabric using the 4 1/2" square, see below.

Finished block - easy, right!

Now, a little bit about which applique block to do first - you might like to think about this. I'll go through each applique block in more detail in the future tutorials.
I don't know about you, but the first block always seems to be the hardest to crack. I think it is because you need to " get into it". I know writers, painters who need to do a trial run first each time they sit down to do some work. I think you need to get the hang of the fabrics in your stash. So, I'll choose a block where you don't need to do a " major" decision - eg the Folly or the House blocks where you have to decide what the roof and building structures would need.
I did the Pond block first - the actual pond itself. I did all the applique of the pond's animals, press and would use the completed piece in the block. By using this as an entree, you'll break the ice. You'll loosen up.

The other block which would serve as an entree is the Fountain. Not too many decisions here.
I'll try to do another tutorial soon, depends if I can get through the day job faster! Cheers, Kim McL
I found that once I started making the Flower Garden quilt I looked at fabrics differently, I was always thinking about how it could be used in applique, it certainly opens your eyes. Thanks for the extra insight Kim.
ReplyDeleteWay to go Pip! I love hearing that! Wonderful things you can find in a piece of fabric, K
DeleteFabulous explanation for using the fabrics Kim. I use the circle templates for so many things but I think I could use the square ones a lot too so will look out for them.
ReplyDeleteThank you Janet, but you are already finding great stuff in fabrics! Thank you again for helping me yesterday on how to do links.
DeleteI have a drawer full of of those plastic template stacks. They do hexagons, octagons, pentagons and many others, just have to find things to do with them. Every time I go to the quilt show, I've ended up buying another stack. K
Kim is being modest when she says that Ombre is her "favourite". It was designed by Kaffe especially for her. He took her suggestions and added his colors and voila!
ReplyDeleteI must admit I was really chuffed when those Ombres were released! Great fabrics, love them, K
DeleteThe red fabric with no name is English Rose but Glorious Color doesn't have it in red : ( but I found it here: www.fabric-inspirations.com
ReplyDeleteI use Perfect Circles by Karen Kay Buckley to make circles from teeny tiny to 5" diameter and if I need any larger sizes I cut my own from Templar heat resistant plastic with my Olfa Circle Cutter.
I received my Pandemonium pattern today! I was worried, but was very pleased to see I CAN do the freezer paper & Best Press method even for the coral looking trees! YIPEEE YAY
Sooooo excited ! But I will try to be strict with myself and finish Flower Basket Medallion first. ; )
Not to worry about that red fabric Sylvi, there are always other fabrics! I was only using that as an example of how a large floral can be used to do a tree so that the tree has a few colours in it. Check out these fabrics, I've found them to be rather useful:
DeleteForest of Arden, Shirt Stripes, Lotus Leaves, Plink, Begonia to name a few. I bet if you go through your fabric stash, you will find a lot of things.
You're good, finishing a project at a time!! I have 4 knitting projects on the go but not going anywhere, K
I've got most of the Fassett/Jacobs/Mably fabrics in all the bright and pastel colors, not so much brown and neutrals, which is why I had to get a lot of those to get more variety in the Pandemonium. I'm only doing KF&F projects one or two at a time...each new KF&F project kind of take over my life.
DeleteMy 15 or so boxes full of non-Kaffe unfinished projects are amazingly easy to ignore when new KF&F fabrics, books or Kim patterns arrive on the scene..... KF&F projects are the new anti-depressants! Y'all help us smile. Thank you Kim, Liza, Kaffe, Philip and Brandon for all your creativity and sharing it all with us.
Thanks for the 2 tutorials. I just read both and all the comments. I know it takes a lot of time; but they are really great. I am also left handed; and look at fabrics for the possibilities with appliqué.It fun was to read about what you see. Thanks again for the great tutorials.
ReplyDeleteNice to hear that people are reading it! I rather enjoyed doing the tutorials, I'm learning new things. K
DeleteTHANK YOU, Kim for your tutorials!!! You have a great eye and are inspiring many to "see" fabrics differently and attempt applique. That is SEW exciting!!! : ) (P.S. now that the word verification has been removed I can post/comment!!!) Yay! <3
ReplyDeleteDear Kim, thanks for the tutorial. I am getting ready to start "Stars and Sprigs" which was my birthday present to myself. It is the first of your patterns I have bought and I am really looking forward to it. I just need to buy some more fabric first! Your tutorials are very useful for me.
ReplyDeleteThank you Heather, glad you are finding it useful. Love to see some of your Stars blocks soon, Kim
ReplyDelete