


Last Summer I started the applique for Kim's Princess Feather pattern. I was asked to post it here, so here I go....
I do my applique a bit different from most people and I posted about it here.
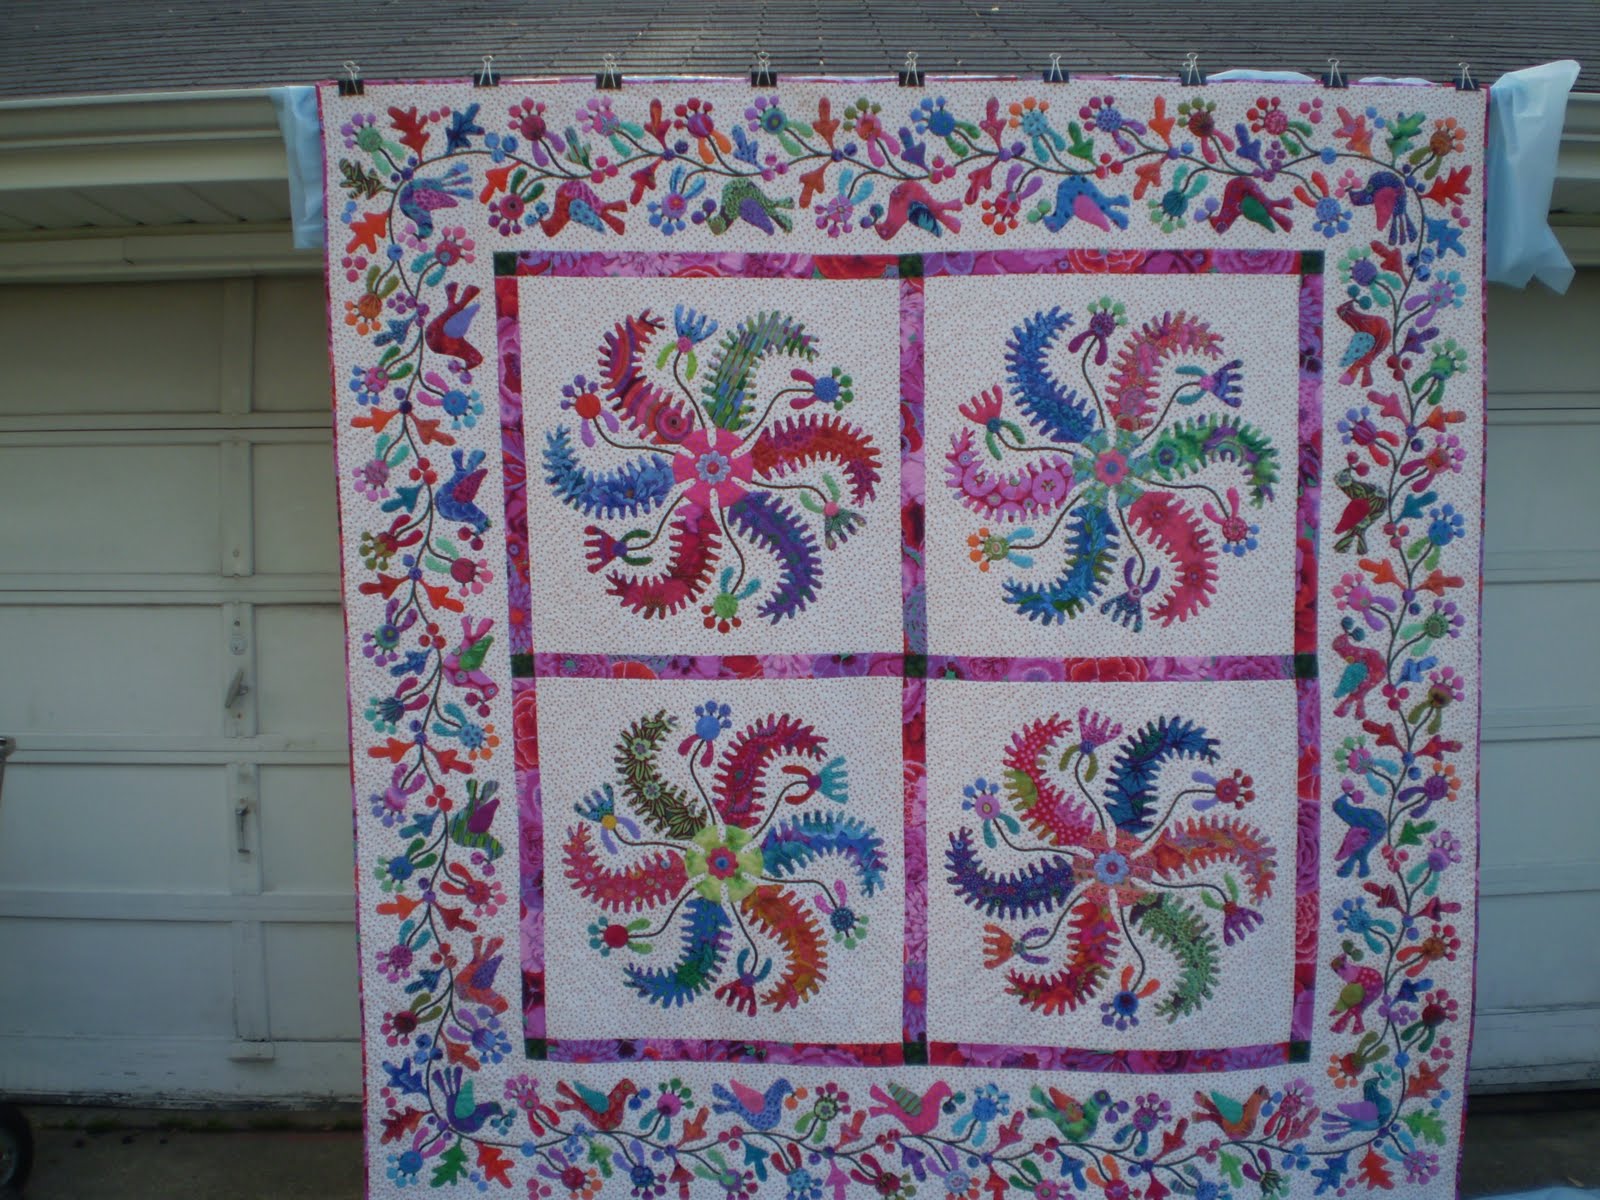
Now for the pics...for lack of a better place, I pinned my blocks to a quilt top I had hanging.
I'm new to blogger and the pics aren't going where I think I'm putting them, so please forgive the odd placement?
I quilted the Princess Feather with 1/4 wreaths in each corner of the blocks and diagonal lines 3/4" apart in the backgrounds of the blocks and borders. I quilted in the ditch around all of the appliques and added a row of quilting through the center of each feather to give it a spine.
For the back of the quilt I used a white sateen weave cotton sheet. It was easy to quilt through, unlike a regular weave sheet, and it gives a pretty look to the stitches. I'm posting a pic of the back side so you can see the quilting a little better.
A lovely job--both front and back! I've looked at photos of similar antique quilts and thought "impossible", and yet you've done it. Thanks for the tutorial too--so many different ways, it's hard to decide which to try. Is the border on Princess Feathers about ten inches wide? (Just thinking/planning/dreaming...I love that border.)
ReplyDeleteI absolutely LOVE this quilt! You did an incredible job with color and workmanship. It is beautiful!!
ReplyDeleteThank you! Donna..the directions have you cut your border fabric 14" wide then trim it down a bit after doing the applique. A border of the Bekah fabric the same width as the sashing around the blocks is supposed to be added to the outer edge. When I did my applique the fabric didn't shrink up much so I left it as it was cut, and opted to omit the wide Bekah border. I used that fabric as the binding instead.
ReplyDeleteIf you do this pattern...one thing to note: Kim's original had mitered borders, but when the directions were written up it was changed to 4 straight borders of the same length with a square at the corners. IMO the square gave it a cobbled in look? I changed it to two borders the same size on each side and a wider border at top and bottom rather than use the square.
I think the directions were changed when they were written to save on fabric?
Stunning! The colors are so cheery...love it!
ReplyDeleteWOW beautiful Ann!!!! The quilting is awesome!! WELL DONE!!
ReplyDeleteCrispy
These are just stunning Ann! And thank you so much for that step-through of your applique technique. I have been very intimidated by the patterns with all the tiny tight curves, but I think I might be brave enough to try using your preparation techniques - mwah!
ReplyDeleteoh Ann I just love your quilt
ReplyDeleteI am determined to finish this quilt too....I may start over though and make it in repros now!
LOL
thank you for your hints
I like the idea of straight borders not mitered or squares added.
Kathie
I love this quilt-I have loved it since the first time I laid eyes on it-but I have not made the purchase yet!
ReplyDeleteLove everything about this quilt. Nice to see it in the different stages.
ReplyDeleteThis is the quilt that has me wanting to make a Kim McLean pattern. The borders are a little intimidating...you did a fabulous job!
ReplyDeleteBreathtaking, Ann!!!!
ReplyDeleteI really love the border on this quilt.
I adore your quilt Ann, you have done an incredible job with it, and your quilting is marvellous. Thanks for sharing this one.
ReplyDeleteAnne, your quilting is really fabulous. Applique of this outstanding calibre deserves great quilting. Beautifully done. Thanks for sharing.
ReplyDeleteThis is truly a masterpiece, Ann. I stand in AWE of you!!! Thank you for sharing it and your techniques with us. : )
ReplyDeleteBeautiful Ann...Love your choice in Colours & Fabrics...Just a little tip on blogging pics...work backwards..the pic you want last goes in first etc...
ReplyDeletecheers
So gorgeous!!! Makes me want to make one. Ahhh... when I get those other 20 quilts done :)
ReplyDeleteThank you for posting all the photos Ann, they are amazing to see up close. I can see the fabrics you've used really well here.
ReplyDeleteI can emphatize with you with posting a blog Ann, I'm not sure how things are done either!
I found out why my internet went very very slow - I went over my monthly allowable gigabytes. Anyway I couldn't look at blogs!! Cheers, Kim McL